Recent Posts
I have always wanted to try Free Motion Quilting (FMQ) ever since I made my first quilt. I have watched countless videos on YouTube and Craftsy. I have decided to just take the plunge and do it this Spring holiday (2 weeks). I really hate wasting craft supplies so I’m going to practise FMQ on small squares of fabric and join them together using Quilt As You Go (QAYG). I first got this idea from this QAYGFMLQAL on Quokka Quilts website. I have decided not to add a border as suggested by the Quilt A-Long (QAL) as I wanted to get right into FMQ ASAP. I am aiming for a lap quilt which are usually 50″ x 65″ so that is roughly 30 squares total if I made the squares ~10″ in szie. I raided my fabric stash and I’m going to do them in solids with contrasting coloured thread so I can see the quilting better. I made my blocks 11″ and might trim them down to 10.5″ before I join them up together. Before I start FMQ, I wanted to try some stitches on my Janome domestic sewing machine so I quilted the first block using the walking foot. I used stitches #1 (stitch length 3), #9 and #14. I like the way some of them look and will quilt this way if I fail with FMQ :). The second block was technically my 4th attempt at FMQ. I did some unpicking as I wasn’t happy with the way some of the previous stitches were looking. There were heaps of mistakes on this block but I’m happy with it as it’s my best so far! This gives me hope that I will keep improving the more I practise. For this block, I found I needed to start slow and finish slow. Otherwise there were too many jerky and big stitches. I also found that I needed to stop frequently and re-position my hands. I was lifting my hand in my first few attempts. Not sure whether...
read more
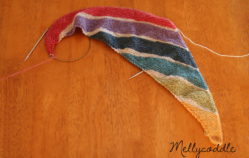
Today is the official start to our Spring Break (2 weeks holiday) and it is also the start date of the Gradient Shawl KAL 2016 on Ravelry. The KAL hostesses are Cheryl (cheryllfaust) and Christine (Christine260). Some KAL Details are: Start: September 19 End: October 23 Knit any of these four designs by Melanie Berg of Mairlynd: Solaris, The Joker and the Thief, On the Spice Market, January Skies I love all 4 designs but have chosen to knit On the Spice Market for this KAL. I have chosen to use Holst Garn Coast which is a 55% Merino Lambswool/45% Cotton blend yarn. It feels so soft and hopefully it would be suitable for the temperatures here in Brisbane. One of the best thing I love about this yarn is that it’s already wound for me! Yay! I can just jump in and start casting on :). I am hopeless at choosing colours but I have finally decided on these 6 colours with off white yarn. I originally had a darker pink/purple and darker blues but I had to substitute a few lighter colours as my local yarn shop ran out of the colours I wanted. Can’t wait to start! You can find out more information and join in the KAL in designs by melanie berg group on Ravelry or in the Gradient Shawl KAL discussion board :)....
read more
Winter is finally here! I have decided to knit myself a scarf/shawl named Fractal Danger by Martina Behm. I recently purchased an Australian Merino/Silk sport weight yarn in light grey. The yarn is really soft and yummy! The pattern is so easy that I’ve decided to knit the garter rows using Continental Method as I need more practise in that method. I’m a self-taught English Method knitter and have been learning the Continental Method using a class on Craftsy: Knit Faster With Continental Knitting with Lorilee Beltman. Lorilee is a wonderful teacher and I’m learning heaps! I’m hoping I can finish this before it gets too warm to use it and also get better with Continental knitting. I can knit but still struggling with purl and everything else. Will get there one day :)....
read more
Yes I’m baking again! This time it’s Raspberry Coconut Slice. My son made it at school and forgot to get a copy of the recipe. We have emailed the teacher to see if we can get a copy. In the mean time, there’s always google. I found a few recipes but only one is close to the recipe my son used at school. The recipe is called Jam and Coconut Slice and can be found on Food to Love website. We wanted it to be as close to the recipe from school as possible so I used all Self-Raising (SR) flour instead of a combination of SR flour and plain flour. We also used less jam as we did not have enough jam and I added extra coconut to the topping as it looked too moist. The Raspberry Coconut Slice was not exactly the same but it still tasted delicious!!! Definitely a recipe I will make again but I think next time I will use all SR flour, use more jam and not add extra coconut to the topping....
read more
My son decided to do Home Ec in high school this semester and have been bringing home some yummy baked food. This has rekindled my interest in baking. One of the first things he made at school was a Cheese Damper. It was yummy so I decided to give it a go. I made a Cheese Damper and a plain damper (sorry no pics). The plain one reminded me of scones so I googled for some quick scones recipes to try. I found some recipes using thickened cream or double cream instead of butter. The recipe using thickened cream is called Ultimate Scones and can be found on Delicious website. This recipe was really easy to do and the scones were yummy straight out of the oven. They were really light and fluffy. Sorry for the mismatched shaped scones! My daughters decided to help with the rolling and cutting out of the scones. The other recipe using double cream is called Cream Scones Recipe and can be found on UK Telegraph website. I didn’t have any double cream so I used thickened cream instead. My poor scones didn’t rise at all but they were still yummy and really light! Sorry about the pic. My girls started eating them before I could take a pic of them all! I tried this recipe again but this time I added some baking powder. They rose more this time and tasted just as yummy. These were also really light and fluffy! Sorry about the pic. Again my girls attacked the scones as soon as they came out of the oven. Next to try is this Vanilla Scones recipe from Taste.com.au that uses thickened cream and vanilla essence. Can’t wait to try it as it sounds and looks yummy!...
read more
Wow I can not believe it’s been ~14 months since my last post! I have been crafting but it has taken a back seat to my studying which I completed in December 2015. Hopefully I now have more time for crafting this year :). I have set myself some life goals and one of them is to improve my manual photography skills especially in macro photography. I am a BIG fan of Craftsy so naturally I looked for a suitable photography class there. There are a lot of wonderful photography classes with two classes on Flower Photography. I couldn’t decide so I went with Photographing Flowers with Harold Davis based on reviews. I am enjoying the lessons I have done so far. I’m currently at Lesson 5 and have gained enough knowledge to have a go in taking close up pics of some flowers in my garden. Here are my attempts: These photos were scaled down and saved at a lower resolution for my blog because of my slow Internet speed. These photos look so much better at the original size and higher resolution! The details are amazing when you zoom in especially the first photo. When you zoom in the original, you could see the fur (is that the right word?) on the outside of the pink hibiscus bud! I should add that our 5 1/2 year old Sony DSLR camera died on us this week so we had to buy a new DSLR camera. We went with Canon EOS 760D with a kit 18-135mm kit lens. I am slowly familiarising myself with the camera and I’m loving it!!...
read more


